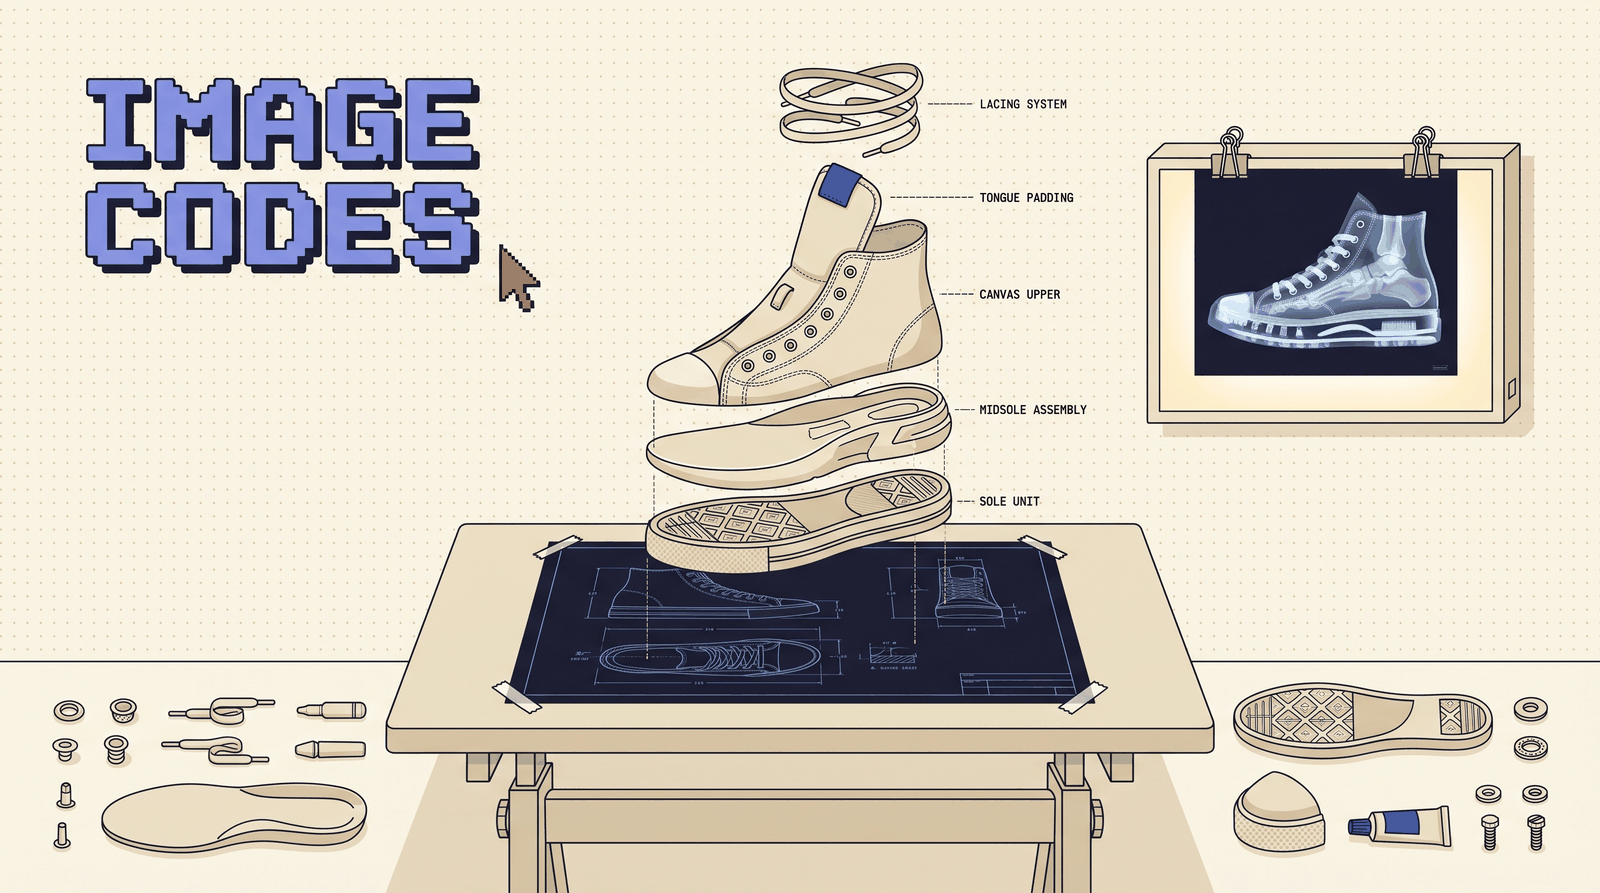
A code is a nickname for a prompt you would otherwise retype. Type it next to a product photo and the model does the rest: pulls the thing apart, drafts it, x-rays it, spins it. These are the seven from the video with the exact prompts that made each output, then thirteen more that turn one clean product photo into a full catalog. Every output in this pack came from a single photo and one code.
How to run a code
- 01One photoClean background, three-quarter view
- 02The codePaste the block, or just the trigger once installed
- 03
 ClaudeWrites the prompt, it does not paint
 - 04The image toolRenders it inside the chat
There is no /explodedview button inside Claude. A code works because you defined it. You are compressing a paragraph of art direction into one word, and the word holds for the rest of the session.
Two ways to fire one
Inline. Attach the photo, paste the full block, send. Works on your phone, works cold, works in any model that takes a reference image. This is the default.
Installed. Paste the pack into a Claude Project's custom instructions once (or into CLAUDE.md if you run Claude Code). After that the trigger alone works. Type /xray, attach the photo, done. Claude reads the photo, fills every bracket with what it actually sees, and sends the expanded prompt to the image tool.
Where the image comes from
 HiggsfieldNano Banana Pro via the connector, or the app
 GeminiNano Banana inside Gemini
 ChatGPTIts image mode, with the photo attached
Claude writes the prompt. It does not paint. Connect an image model once and it renders inside the chat. I ran every output in this pack on Higgsfield's Nano Banana Pro through the Higgsfield connector.
On claude.ai: Settings, then Connectors, then add a custom connector with this URL and sign in when it prompts.
https://mcp.higgsfield.ai/mcp
In Claude Code: add it from the terminal, then run /mcp and authenticate in the browser window that opens.
claude mcp add --transport http higgsfield https://mcp.higgsfield.ai/mcp
No connector? The prompts are plain text. Paste them with the photo into any image model that accepts a reference: Nano Banana inside Gemini, ChatGPT's image mode, or the Higgsfield app directly.
The rules
- THIS exact is the load-bearing phrase. It tells the model to keep your product instead of drawing a generic one. Never cut it.
- One photo. Clean background, three-quarter view, sharp, no text on top. A phone photo works. A cut-out works better.
- Set the ratio in the tool. Wide sheets run at 21:9 or 16:9. If your tool has no ratio setting, end the prompt with "21:9 wide".
- Fill every bracket. Empty brackets are where the model starts inventing parts.
- Generate two, keep one. Every pair in the video was picked from two.
- If it comes back as a different product, add three real design cues (the material, the camera layout, the shape of the cap) and re-send.
The model cannot see inside your product. Cross-sections, x-rays and exploded views are educated guesses. List the real internals when accuracy matters, and enjoy the invention when it does not.
01/explodedview
Every product is a stack of parts pretending to be one object. This code pulls them apart along one axis and labels them, the way Apple draws its own keynotes. It runs first in the video because it is the one people screenshot.
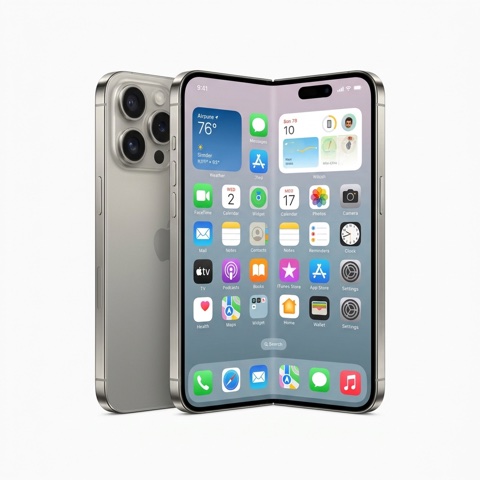
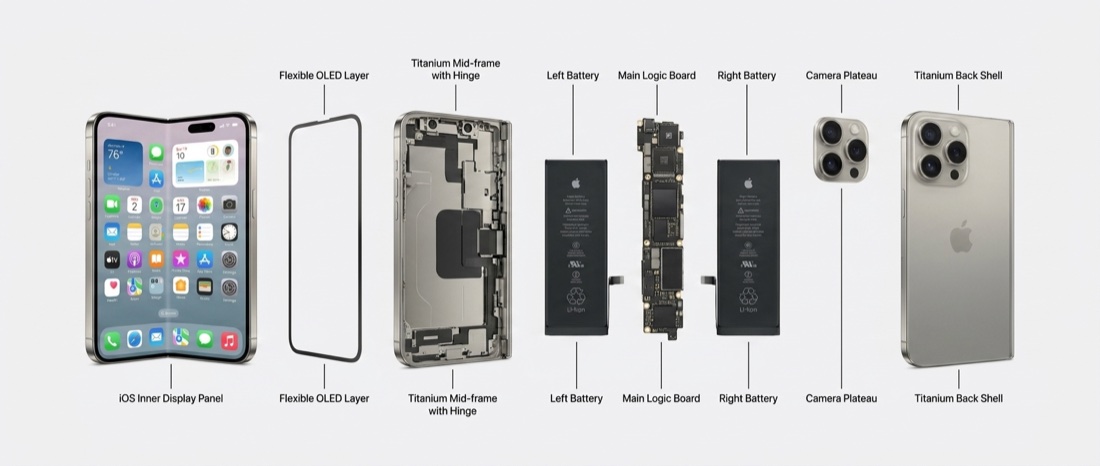
/explodedview: Exploded view technical illustration of THIS exact [product] laid out left to right in a single horizontal row of floating parts: [the real parts, outermost to innermost]. Each part separated by an even gap, thin leader lines and small labels, photorealistic product-render style on a light grey studio background, wide panoramic composition. Faithful to the reference's colors, materials and design.
Feed it: one photo, and the real part list if you know it. It reads the photo and guesses otherwise.
Use it when: launch posts, teardown threads, anything that says "here is what you are paying for."
A single row beat a diagonal stack at reel size. When the parts came back wrong (the foldable phone turned into a generic Android teardown on the first run), naming three real design cues in the prompt fixed it: the titanium, the camera plateau, the iOS home screen.
02/blueprint
Three views, dimension lines, a title block. The model does not know the real measurements, so treat the numbers as set dressing and the drawing as the asset. If the numbers matter, paste the real ones into the prompt and it will letter them in.
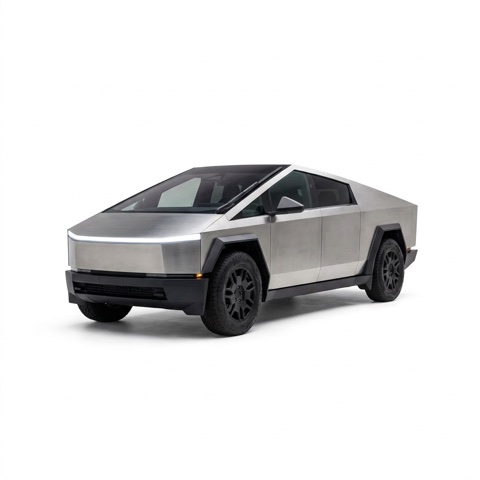
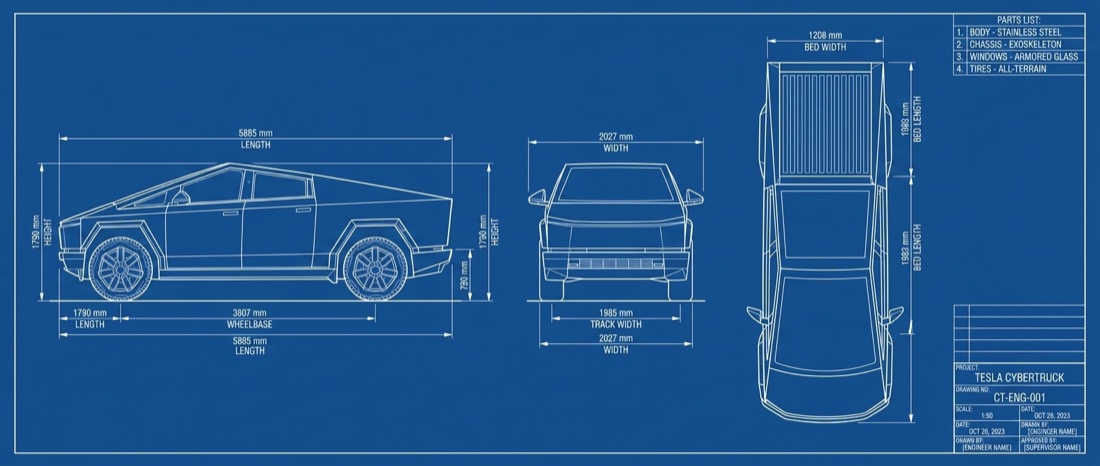
/blueprint: Engineering blueprint of THIS exact [product]: white technical line drawings on a classic blue blueprint background. Side view, front view and top view laid out left to right with dimension lines and measurements in millimetres, a small parts list table and a title block on the right. Precise drafting style, crisp thin white lines, wide panoramic composition.
Feed it: the photo. Add "use these dimensions: [list]" if you have them.
Use it when: posters, print, packaging inserts, any brand that wants to look engineered.
03/anatomy
The food version of an exploded view: layers pulled apart and named, with a magazine title on the left. It works on anything with a stack inside it. A burger, a sneaker, a skincare routine, a cocktail.
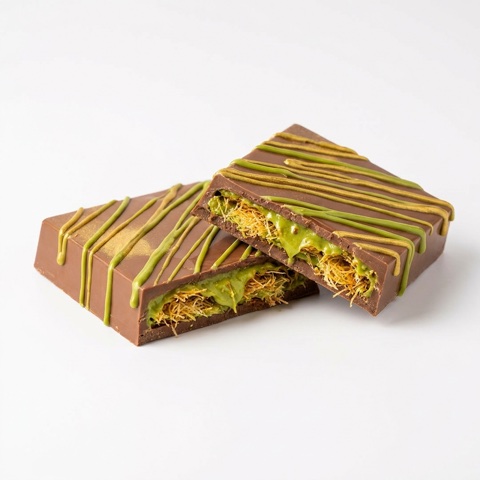
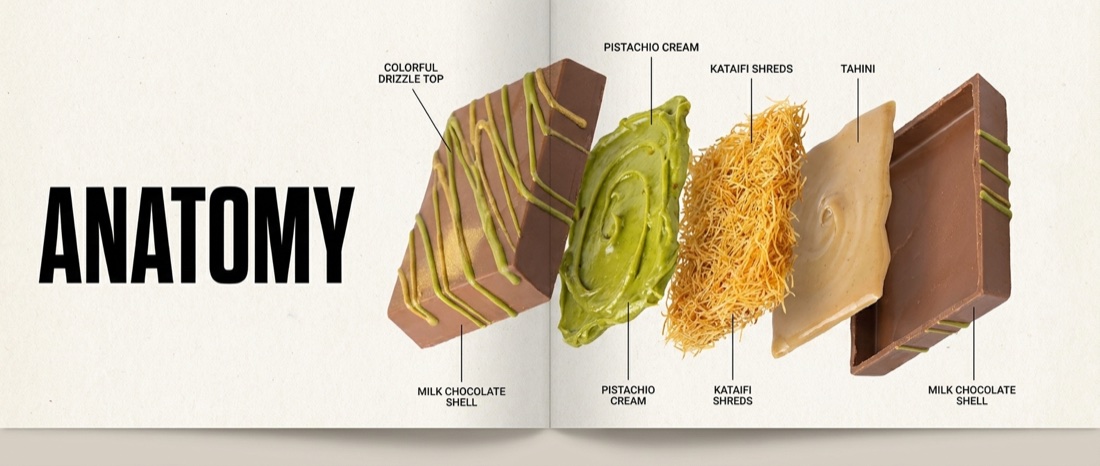
/anatomy: Anatomy infographic of THIS exact [product]: deconstructed into its layers floating apart horizontally, [the layers, top to bottom], with thin callout lines and small labels naming each layer, bold title
'ANATOMY' on the left, editorial magazine layout on an off-white background, photorealistic, wide panoramic composition.
Feed it: the photo and the layer list in order. Naming the layers is what makes it read as fact instead of decoration.
Use it when: menus, recipe posts, ingredient marketing, "what is actually in this" content.
04/360view
Eight angles of the same object on one sheet. The trap is the side views. The first run stood the glasses on end, because the model does not know what "profile" means for your object until you tell it. Define the side view in plain words and it lands.
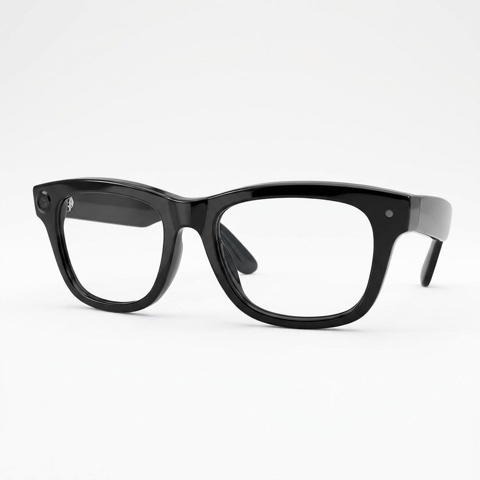
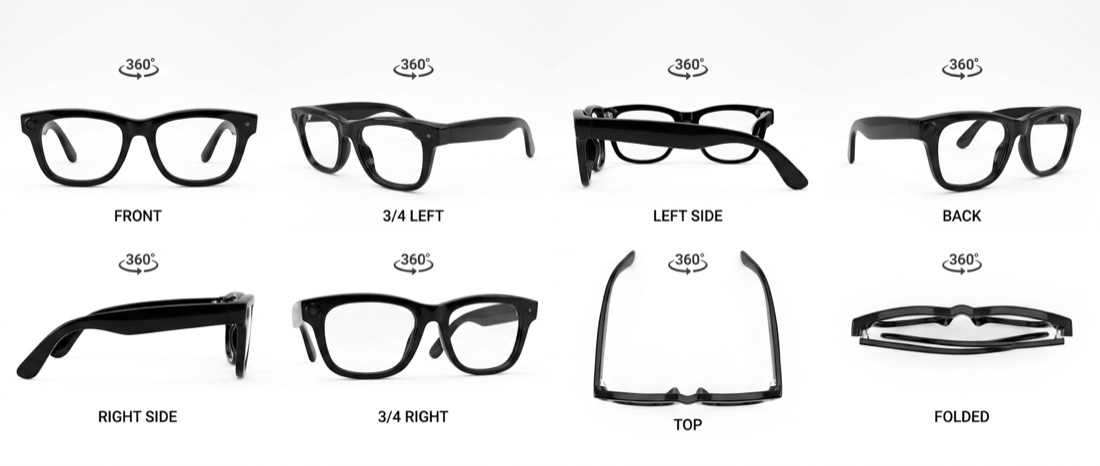
/360view: 360 degree turnaround product sheet of THIS exact [product]:
eight views in one wide row on a pure white background, each with a small caption below and a small '360°' arrow icon above. Views in order: FRONT,
3/4 LEFT, LEFT SIDE (a true profile: the object seen exactly from the left, [what that looks like for this object]), BACK, RIGHT SIDE (a true profile, mirror of the left), 3/4 RIGHT, TOP, [its folded or resting pose]. Identical object, scale and lighting in every view, photorealistic, wide panoramic composition.
Feed it: the photo, plus one sentence describing a true side view. For the glasses it was "temple arm horizontal, lens rim seen edge-on."
Use it when: product pages, resale listings, anything that wants to feel like a 3D spin without a 3D file.
05/crosssection
Slice the top half off and show the mechanism. Best on anything with a working inside: pens, watches, speakers, engines, bottles. The model invents internals it cannot see, so list the real ones when the diagram has to be right.
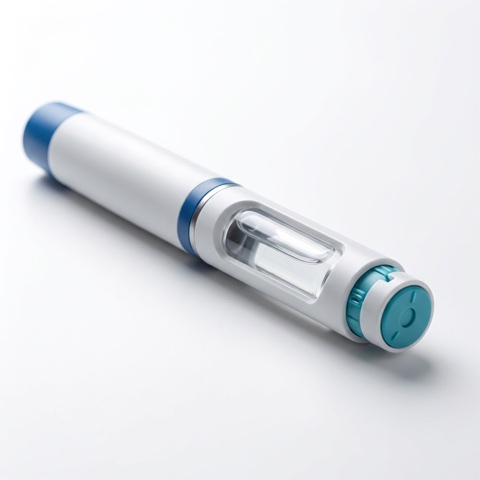
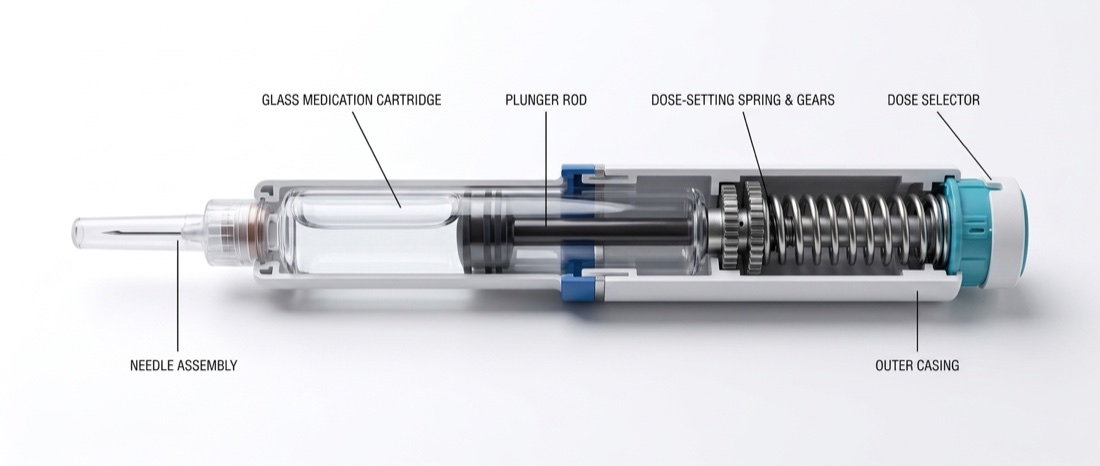
/crosssection: Cross-section cutaway illustration of THIS exact [product] lying horizontally: the top half of the casing sliced away to reveal the internal mechanism, [what is inside, front to back], with thin callout lines and small part labels, photorealistic macro render on a clean white studio background, wide panoramic composition.
Feed it: the photo and the internals in order. "Glass cartridge, plunger rod, dose spring, needle" is enough.
Use it when: explainer posts, "how it works" carousels, product education that used to need an illustrator.
06/xray
A radiograph triptych: the object, its x-ray, and a close-up of the best part. On a toy it invents a skeleton, which is the joke. On electronics it shows boards and batteries. Black background, so it stops a feed.


/xray: X-ray view of THIS exact [product] shown three times in a row on a black background: left the normal object, center a translucent blue-white radiograph revealing what is inside ([the internals, real or invented]), right a close-up x-ray of [the most interesting part]. Medical x-ray aesthetic, sharp and detailed, wide panoramic composition.
Feed it: the photo. Decide whether you want the truth (boards, batteries, stuffing) or the bit (a skeleton in a plush toy).
Use it when: you need a scroll-stopper. This one out-performed every other code in the set for comments.
07/knolling
Everything laid out at right angles, shot from directly above. The cleanest one in the set, and the one brands pay a photographer a day rate for. Name what comes off or out of the product, or it will lay out things that do not exist.
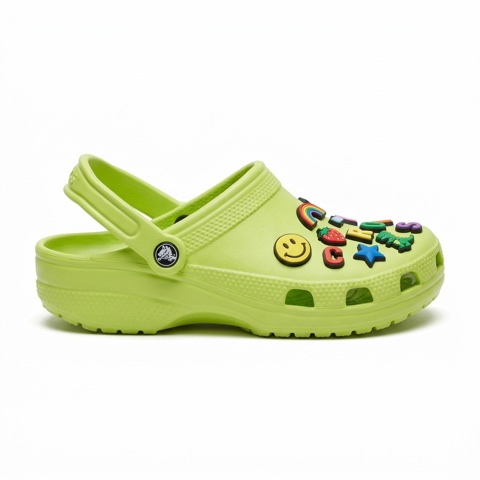
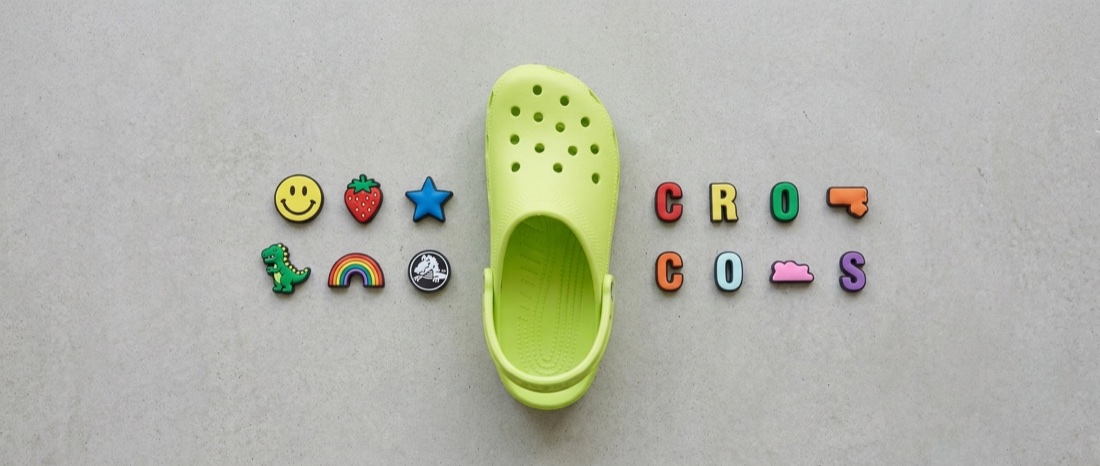
/knolling: Knolling flat-lay photograph of THIS exact [product] and everything that comes with it or off it: the [product] in the center, all of its [parts, accessories or contents] arranged at perfect right angles in neat rows around it, shot from directly above on a plain light concrete surface, even soft lighting, photorealistic, wide panoramic composition.
Feed it: the photo and the inventory. "The empty clog and all twelve charms" is a better instruction than "its accessories."
Use it when: what's-in-the-box posts, kit reveals, packing lists, any product that ships with parts.
08-11Build codes
Four more that show how the thing is made. Same rules: THIS exact, one photo, fill the brackets, generate two.
08 · /ghosted
Render THIS exact [product] with its outer shell turned semi-transparent so every internal part is visible in place, in full color, nothing exploded. Studio lighting, clean white background, photorealistic.

09 · /patent
Patent drawing of THIS exact [product]: black ink line art on white paper, fine hatching for shading, numbered reference callouts (10, 12,
14) with leader lines, 'FIG. 1' front view and 'FIG. 2' side view.

10 · /wireframe
THIS exact [product] half finished render and half 3D polygon wireframe mesh, the mesh in thin cyan lines dissolving into the finished surface, dark grey studio background, product design showcase style.

11 · /assembly
Four panel assembly sequence of THIS exact [product] in the style of a furniture instruction manual: simple black line art, numbered steps, an arrow showing the motion in each panel, a parts count in the corner.
12-15Detail codes
Four for the close-ups. Run these at 4:3 or 1:1 instead of wide.
12 · /materials
THIS exact [product] centered, with a swatch pulled out for each material it is made from ([titanium, glass, rubber, canvas]), connected by thin leader lines and labeled with the material name. White background.

13 · /macro
Extreme macro photograph of THIS exact [product], 10x magnification on [the stitching, the finish, the button, the grain], shallow depth of field, the rest of the object falling out of focus, studio lighting.

14 · /scale
THIS exact [product] next to a human hand, a coffee mug and a coin for scale on a plain surface, a thin ruler bar underneath marked in cm.
Photorealistic, soft light, everything at true relative size.

15 · /sketch
Industrial designer's concept sketch of THIS exact [product] on paper:
loose marker and pencil linework, a few color washes, handwritten annotations and arrows, two alternate angles drawn in the margin.
16-20Catalog codes
Five that turn one photo into a product page. Wide again.
16 · /lineup
THIS exact [product] repeated six times in a single row on white, each in a different colorway ([name them, or 'six colors that suit it']), identical angle and lighting, a small color name caption under each.

17 · /packaging
Retail packaging for THIS exact [product]: the closed box on the left and the same box open on the right with the product seated in its insert, brand-appropriate design, no readable text, studio lighting.

18 · /specsheet
Spec sheet poster of THIS exact [product]: the product large in the center, six feature callouts around it with thin lines and short labels using only these real specs: [paste them]. Dark editorial layout.

19 · /studio
Three-shot e-commerce set of THIS exact [product] in one row: a hero three-quarter shot, a detail close-up, and the product in use, identical lighting and background across all three, white studio backdrop, photorealistic.

20 · /evolution
THIS exact [product] as it would have looked in 1985, 1995, 2005 and today, four versions in a row on white with the year under each, period-correct materials, colors and design language, same scale.
Install the pack
Inline is fine forever. Installing takes two minutes and turns every code into one word.
- Connect the image model. The Higgsfield connector from page one, or whichever image tool you already have wired into Claude.
- Open a Claude Project and paste all twenty codes into the custom instructions.
- Add one line at the top: "These are my image codes. When I type one with a photo attached, look at the photo, fill every bracket with what you actually see, expand it into the full prompt, and generate it through the image tool at the ratio the code names. Show me the expanded prompt with the image."
- Set the ratios once: "Wide sheets at 21:9. Detail codes at 4:3." Now you never type a ratio again.
- Keep your products in the project. Drop the clean photos of the things you sell into project knowledge and the codes run on them by name: "
/lineupthe black hoodie."
In Claude Code the same block goes in CLAUDE.md, and the images land in your project folder instead of the chat.
Run it tonight
Pick one object within arm's reach. Shoot it against a wall, cut the background if you can, and run /explodedview on it. Then run /knolling on the same photo. You now have a pair, and a pair is a post: input on the left, output on the right, the code in a pill between them. That is the whole video.
If you sell something, run /360view and /lineup on your best product first. Those are the two that used to cost a shoot. If you make content, /xray and /anatomy are the ones that get comments, because everyone wants to see inside the thing they just bought.
Steal these. Rewrite the brackets for your own products once you know what each code does. A code you edited is a code you will actually type. For more build-with-AI playbooks, follow opusjake.ai.